Body 1 Wrap Top
- Alice Whittle Hall

- Sep 20, 2019
- 3 min read
Notes: General stitch length is 2.5cm, and will be used unless otherwise indicated (for gathering purposes) and the general seam allowance is 1cm and will be used unless otherwise stated.

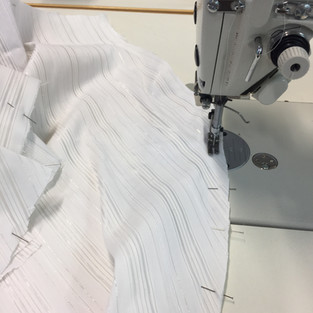
Step One: Lay out the fabric and identify the right side and grainline (which is usually parallel to the selvedge). Place the pattern pieces on the fabric according to the grainline. It is also important to match up the pattern pieces with the patterns on the fabric and to place the pieces all in the same direction of the fabric so it all lines up properly. Make sure to read the cutting instructions on the pattern piece to see if it is cut on the fold, or cut one single so you can place it appropriately. Step Two: Trace around the pattern pieces with tailor's chalk, and cut out the pieces. For this garment, there will be two left fronts, two right fronts, two backs, one pair of top sleeves, one pair of sleeve ruffles, one pair of bottom sleeves, one pair of small ties, and one pair of larger ties.


Step Three: Cut out fusing pieces and fuse the relevant fabric pieces, which in this case, are only the two pairs of ties. Fold one tie in half longwise, and plain sew with a 1cm seam allowance around the 3 edges, leaving a 10cm gap in the middle to turn through. Turn the tie through and press flat. Topstitch around the three edges, and secure the open gap at this time as well. Repeat this step for all of the ties.

Step Four: Using a plain sewer machine and the same coloured thread, place the pieces with right sides together, and sew one of the two fronts and back together at the shoulder seams. Use a 1cm seam allowance for this. At this point, it is important to identify which of the shells will be the outer and which will be the inner. For the inner, take one of the smaller ties, and pin it to the notched or ideal area in the right side seam. Then sew the side seams together using a 1cm seam allowance again. For the outer, take one of the larger ties, and pin it to the notched or ideal area in the left side seam. Then sew the side seams together using a 1cm seam allowance.


Step Five: Take the 'vest' shape that will serve as the inside. Pin the other small tie to the notch or ideal location on the edge of the left front, where it will be secured when the two 'vests' are bagged out together. Take the 'vest' shape that will serve as the outside. Pin the other larger tie to the notch or ideal location on the point or corner of the right front, where it will be secured when the two 'vest' shapes are bagged out together.


Step Six: Bag out the two 'vest' shapes. This means pinning the two 'vests' together with the right sides together. The inner and outer left fronts will be pinned together, the backs will be pinned together, and the inner and outer right fronts will be pinned together. The pins should be everywhere except the armholes, as these are not to be bagged out or sewn at this point. After pinning and making sure the edges match, plain sew with a 1cm seam allowance all the pinned areas, making sure to leave the armholes unsewn. Remove the pins and use one of the unsewn armholes to turn the entire garment through to see how it looks and sits.
Step Seven: Turn back inside and overlock the raw edges at this point. Turn out to the outside and press the entire garment flat so that it sits nicely and there is no overlap from the outer to the inner.


Step Eight: Prepare the sleeve pieces by using a large (4cm) or gathering stitch to plain sew a single line of gathering at 5mm on the ruffle piece. Backstitch at the beginning, but do not backstitch at the end so there are loose threads to pull. Pull the top thread gently to create gathering. Repeat this for both ruffles and for both bottom sleeve pieces. Attach the ruffle to the top sleeve piece by pinning and organising the gathering so it sits nicely and then plain sewing at a regular 2.5cm stitch length with a 1cm seam allowance. Attach the gathered bottom sleeve to the midsection of the sleeve using the same method as the previous part. Overlock the sleeve raw edges using a three thread overlocker with appropriately coloured threads. Attach the sleeves to the armholes using the set-in sleeve method. Overlock armhole raw edges closed.
Step Nine: Give garment a final thorough press and focus on the ties, and smoothing any seams.


Comments